|
XBOX
EVOLUTION
Full Guide To Install Xodus/Matrix &
setup EvolutionX (v0.2)
Full Guide To Install Xodus/Matrix & setup EvolutionX
(v0.2)
Thanks to Kleiner aka (okkleiner IRC) for this article.
Tutorial written by : Kleiner aka (okkleiner IRC)
Feel free to pass this on. If on the web EDIT/ERASE “Where
to get files”.
This Help doc is mostly for the Xodus/Matrix chip, however
it can be easily adapted to help others with a different mod
chip.
FYI: This is my opinion on how to set it up. There are a
few other ways.
If you use ALL the directions and RECOMMENDED software IT
will work. 45 to 120 min.
** What you will need: **
Hardware:
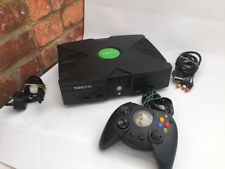
* Xbox (1st generation v 1.0)
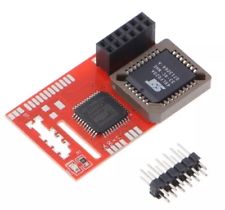
* Xodus/Matrix Mod Chip
* LAN connection From PC to Xbox (optional, but recommended)(could
use boXplorer)
* 1 CD-RW (not CD-R)
Software:
* WinLPC (or Milksop’s version)
* Nero (or another ISO burning software)
* FlashFXP (or another PC FTP application)
Files:
* Evox 2.5 Bios (with color logo, and ybox) (error read,
and no animation optional).
Optional: (if creating your own ISO – XISO and EvolutionX
dashboard)
* XISO or ISO Maker software – to create your own ISO
(some think XISO is buggy).
* EvolutionX 1.8.2812 = Most current version (v 1.8.458 is
OLDER!)
* BoXplorer – if needed (Xbox app like windows explorer)
Where to get help/Info?:
* On IRC (MIRC) Efnet - Channel #xbins4newbies
What is a .XBE file extension?:
* .XBE is to the Xbox as .EXE is to the PC. (executable file
extension)
** Explanations on what you should know: **
Evox Vs. EvolutionX (what’s the difference) ?:
Evox is the bios that will go on your Xodus/Matrix Mod chip.
* The Evox bios allows you to run non approved Microsoft
hardware and software.
* With just the mod chip installed you can run backups of
your games.
EvolutionX is the dashboard that will go on your boot CD-RW
and your Xbox HD (optional)
* The EvolutionX dashboard allows you a personally customized
interface/dashboard.
Ybox – Why you want it? And what it does? - yes “Y”box:
This will make more sense as you read further down. But it
is important to state it early, because your Bios choice will
depend on it. If you plan on playing Xbox Live or a game that
is made for it, such as NFL 2K3, then you WANT ybox (bios).
The ybox is a bios (evox 2.5) addition. When the first dashboard
were being put on the Xbox, they would take the following
steps:
Connect to Xbox and change the original Microsoft Xbox bios
from “xboxdash.xbe” to “msxboxdash.xbe”
Then they would put the evolutionx dashboard on the Xbox and
name it ”xboxdash.xbe”. The bios would search for
this file and launch the evolutionx dashboard, instead of
the Microsoft Xbox original dashboard, because the bios was
looking for “xboxdash.xbe”. This was fine until
Xbox Live came out with games that look to update the “xboxdash.xbe”
file to make it more compatible with Xbox Live.
So the GREAT developers of the Evox bios created the ybox
addition. It makes the bios (evox 2.5 with ybox enabled) look
for “yboxdash.xbe” instead of “xboxdash.xbe”
on the Xbox hard drive.
Therefore ybox allows you to run a different dashboard (EvolutionX)
on the Xbox and still maintain the original “xboxdash.xbe”
intact without modification.
How do I open the Xbox?:
http://www.xodus-chip.com/installationmanual.html
Xbox Hard Drive Sizes?:
There are currently 2 hard drives that come with the Xbox:
8gig Western Digital (older Xbox models)
10gig Seagate (newer Xbox models)
The difference of the two drives is 2gig’s. This is represented
in the “F” drive on the Xbox. The Seagate will have
a 2gig “F” drive and the WD will have zero 0 bytes
in the “F” drive.
When Installing the Xodus/Matrix Mod Chip, do I need the
power on to see the light?:
YES.
Do you have to install the Xodus/Matrix mod chip with power
on?:
NO.
BoXplorer:
BoXplorer on the Xbox is like Window Explorer for MS Windows.
BoXplorer lets you view and edit the contents on your xbox
without any outside connection (LAN). This is helpful for
those that do not have a LAN at there location or a means
of connecting a PC via FTP to there Xbox. You can create a
second ISO and put BoXplorer on it and run it like a boot
CD-RW listed above. This would allow you to copy the EvolutionX
and evox.ini files to the Xbox without using a PC, LAN, and
FTP connection.
Erasing CD-RW media:
It is ok to use an erased CD-RW. I have not had problems erasing
CD-RW on quick erase. However if you encounter problems you
should try a full erase.
** Flashing your xodus/matrix mod chip: **
You need the mod chip, programmer, and a new 9volt battery.
You do not need a cable. The programmer connects straight
to the parallel (printer) port of your PC.
http://www.xodus-chip.com/download.html
To make the installations of the battery easier. Take a flat
screwdriver and open the prongs on the large connection of
the battery. Next install the battery into the programmer.
This may take a little force. Next connect the programmer
and mod chip together (only goes one way). Next connect the
programmer to the parallel port of your PC.
Create a temp folder on your PC. Unzip the Evox 2.5 bios into
this folder.
Launch WinLPC and flash the Evox 2.5 bios onto your mod chip.
If WinLPC does not work try Milksop: http://warmcat.com/milksop/milksop.html
The flash should take 1-2min.
If the flash fails try… try… again.
** Creating the boot CD-RW (with evolutionx 1.8.2812): **
Create a Temp folder on you PC. Unzip the Dummied ISO file
into the temp folder. Insert blank CD-RW into PC.
If you don’t have this file see “How to create your
own ISO for the boot CD-RW:” below…
Launch Nero.
Click on “file”. Click on “burn image”
Select the ISO from the temp folder.
3 IMPORTANT RULES when burning Xbox ISO’s:
1. Finalize CD
2. use DOA = Disc At Once
3. Burn at slowest speed you can (usually 4x)
While this burns you can install the flashed Xodus/Matrix
chip into the Xbox. TIME SAVER!
When the boot CD-RW is done. Try to read it with your PC using
Windows Explorer. You should not be able to read the boot
CD-RW. This is good.
** Installing your Xodus/Matrix Mod Chip: **
TAKE YOUR TIME!
http://www.xodus-chip.com/installationmanual.html
Install The Xodux/Matrix Mod Chip while you are burning your
boot CD-RW. This will save you time! It also forces you to
install the chip a little slower, because the burning of the
boot CD-RW will take some time.
DON’T forget the washer. If you use the tape with the
washer. Make sure you so not cover any of the contact points
the pogo pins will be touching.
I recommend installing the Mod chip with the power off, however
most people install it with the power on. It will take the
boot CD-RW about 20+min to burn. This gives you time to try
to install the mod chip with the power off. Install chip turn
on power look for blinking light, nope, repeat process. If
10 min pass then try it with the power on. My thinking is
why install a chip in a BLOWN UP Xbox. TAKE YOUR TIME.
When you get the alignment you will see the mod chip light
blink green. Mine blinks red for 1/2 sec then blinks green.
This is OK. After lining up complete Power off the Xbox.
Next you choose what setting you want to put the mod chip
into by flipping the dip switches. I put mine into mode 2
(That is 1 off 2 on) if this is what you want, then just flip
the #1 dip switch from “on” to “off”.
Then power on the Xbox. You will notice that the light now
stays a constant green (no more flashing).
Congratulations you have successfully installed the Xodus/Matrix
chip with Evox bios on it.
FYI: if you have ybox you will get an error screen after the
logo screen. Usually error “16”, but could be another
number. THIS IS OK. This is the bios searching for the “yboxdash.xbe”
on the hard drive and not finding it, because we have not
put it on the CD-RW or the Xbox hard drive yet.
** Insert the boot CD-RW into the Xbox: **
Straight forward. Insert boot CD-RW into xbox. Power Xbox
off. Power on Xbox. After the logon screen you will see the
EvolutionX dashboard. If you are using the dummied file ISO
off the FTP site, you will see the Silver Woman background
or spinning EvolutionX logo. If your boot CD-RW does not work.
Then you should try to power off and on the Xbox (3 time)
to see if it will take. If not you will need to recreate the
CD-RW. I have not encountered or helped anyone (20+) that
has had a NEW CD-RW not work. I have encountered someone that
had an old generic that did not work.
You are currently at a point if all you want to do is play
backups. You are done.
If you want to add applications and other stuff, I would put
the dashboard on your Xbox.
** Connect via FTP from you PC to your Xbox: **
There are many ways to have you LAN connected: http://evox.xboxhackz.net/evox/guides/body_basic_networking.html
If you are running a router or windows XP. They will both
give the Xbox an IP address via DHCP. If you are running an
older PC OS, (not on router) a Hub, or Direct Connect. Then
you will need to setup a Static IP address on your xbox via
the evox.ini file.
Connect your LAN (RJ45) to your Xbox. Reboot Xbox with the
boot CD-RW in the DVD drive. This will let the EvolutionX
dashboard load. The EvolutionX dashboard enables IP addressing.
Select “System Utils” then “Settings”.
You will see your Xbox IP address at the top of the screen.
Write this IP address down. Go to your PC. Launch FTP program
(FlashFXP). Connect to the Xbox using the IP address with
xbox\xbox as id\password port:21. You should now be connected
into your Xbox. Go to the D drive on you Xbox via FTP. This
is the DVD drive on your Xbox. Copy the files “default.xbe”
and “evox.ini” over to your PC. Rename the file
on your PC from “default.xbe” to “yboxdash.xbe”.
Now copy the renamed files off your PC “yboxdash.xbe”
and “evox.ini” to the C drive on your Xbox (root
of C). You just copied over the EvolutionX dashboard and appropriate
evox.ini file from the boot CD-RW in the DVD drive of your
Xbox to the C drive of the Xbox. You know have the EvolutionX
dashboard on your Xbox hard drive. Go to your Xbox and remove
the boot CD-RW out of the DVD player. Reboot the Xbox. Congratulations,
you should now see the EvolutionX dashboard on your Xbox.
FYI: if you are not running DHCP, you need to edit the evox.ini
file on your PC. On your PC open the evox.ini file (with a
txt editor [WordPad]) and change the Static IP setting = from
“no” to “yes”. Then close and save the
file and copy it over to your Xbox hard drive via FTP as listed
above. This will allow you to set the IP address (default
192.168.0.3).
Is your Xbox locking up when connecting? The Xbox does not
like some FTP programs from what I have heard. That is why
I recommend FlashFXP. Still speculation…
You can now connect via FTP to your Xbox and change/add files
and apps to your Xbox.
** How to create your own ISO for the boot CD-RW: **
What you will need:
* Nero (or another burning software)
* XISO (or another ISO maker like ISO Maker)
* Dashboard file (EvolutionX)
* Blank CD-RW
Create a temp folder on your PC. Unzip (if needed) the EvolutionX
dashboard file into the temp folder you created. Launch XISO.
Click on “Tools”. Click on “Make a xISO”.
Choose location of files (the temp directory you made). Save
xISO file location (DON’T save the ISO in the same temp
folder. Save it somewhere else). Insert blank CD-RW into PC.
Launch Nero. Click on “file”. Click on “burn
ISO”. Choose location where you saved the ISO you just
made in XISO.
IMPORTANT when burning Xbox ISO. 3 STEPS:
1. Finalize CD
2. use DOA = Disc At Once
3. Burn at slowest speed you can (usually 4x)
When the boot CD-RW is done. Try to read it with your PC
using Windows Explorer. You should not be able to read the
boot CD-RW. This is good.
I want to thank everyone who helped me especially www.xbox-scene.com
(tutorials and forums section) and efnet #xbins4newbies (all
the users that helped me and let me help them).
I put this information together, because I find most of the
help docs out there are either too specific, or too vague.
Which is nice, but some people need detailed quick instructions
to get this done.
If there is any false information in this document. Please
change it to represent the true facts.
As mentioned above:
Feel free to pass this on. If on the web EDIT/ERASE “Where
to get files”.
Tutorial written by : Kleiner aka (okkleiner IRC)
The Hottest DCEmu Posters
|